You have no items in your shopping cart.
What you need for a Fence
Key Electric Fence Components
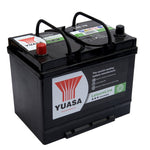
The Electric Fence Energiser. Sometimes also called a charger or fencer
A Wimp of an Energiser will give you a wimpy fence. The Energiser needs to be powerful enough to deliver a definite jolt when your horse touches it, even when its current is reduced by vegetation touching the fence line or (as sometimes happens) by moist, dewy early-morning conditions. Ignore energisers whose power is rated by STORED joules - this figure does not mean much as it is simply Electric Fencing Energiserthe energy stored in the capacitors before it goes through all the electronics to render it safe and effective. Depending on the quality of the electronics, there is always a loss in energy before it gets to the fence.
Look instead for one rated by OUTPUT joules, this a measure of the energy that the energiser is actually sending out to the fence once every second. One joule is a minimum rating for fencing that encloses up to five acres, it is recommend getting the most powerful energiser you can afford. A higher joule rating doesn't mean the fence's jolt--which can't injure horses or other animals--will be harder or more painful, but that it will be more consistent.
Some energisers are rated by "Miles of Wire". This is relative but remember these are invariably under test laboratory conditions and use the best conductors to achieve the maximum reading (better for marketing)

The difference in cost will be insignificant compared to the value of your horses and your peace of mind; expect to pay £100 to £120 for a good one-joule energiser that plugs into an outlet in the barn or elsewhere; six-joule energisers now sell for less than £200, a small premium for peace of mind. (Worried about your electric bill? Fence energisers use negligible amounts of power, whatever their rating.) It's possible to run High Voltage insulated cable up to 1/2 mile from an energiser to the fence without significant power loss. Install the energiser under cover where you can check it easily during each day's routine. Most chargers have a light that flashes with the electric pulse when they're plugged in and functioning.
Ground system.
This is a series of galvanized-steel rods pounded into the ground and connected by insulated cable to the "ground" terminal on the fence energiser. (In areas where soil is very dry, three or more rods may be needed.) Assuming that you have a good energiser, the ground system is the key to your electric fence's effectiveness. If your horse touches the fence, he feels a jolt only when the brief pulse of electric current that goes through his body and into the ground is picked up by the ground system and returned to the fence energiser, completing the circuit. Be sure to use a ground rod clamp to attach the ground wire as tightly as possible to the rod, rather than just wrapping it around.
Insulated cable.
The cable that carries the electric pulse from the energiser to the fence needs to be specifically for electric fence, with insulation rated for up to 20,000 volts (most fence chargers emit from 5000 to 10,000 volts)--the same degree of insulation as on automobile spark plugs. By using cable designed for electric fence, you avoid the electricity leakage that results when you connect the charger to the fence with standard household electric cable, whose insulation is rated for only 600 volts.
When attaching the cable to the fence itself, use a connector clamp rather than just wrapping the cable wire around the fence; cable connected by wrapping comes loose more easily or loses power due to oxidation or corrosion build up. All fence manufacturers sell a connector clamp designed to work optimally with their product. You'll also need the cable to carry the electric fence current from one side of a gate to the other: Connect all strands of the fence to the cable on the side of the gate nearest the charger.
Cut-off switch(es).
Save lots of extra steps by installing a weatherproof cut-off switch the insulated cable and its attachment to the fence, enabling you to turn the fence off without going back to the barn to unplug the charger. It is also an idea to install cut-off switches on both sides of a gate--multiple cut-off switches allow you to isolate sections of the fence for easier trouble-shooting.
The fence itself.
Choose a product with a long warranty (for instance, some fence materials have a guaranteed lifetime of 20 years) and follow the manufacturer's recommendations for number and spacing of strands. The first strand is aimed at the targets nose-height as that is what all animals use to investigate a foreign object. Space the top two or three strands no more than 12 to 14 inches apart and the lower strands 18 inches apart, with the lowest strand 18 inches from the ground to minimize interference by grass and weeds. The quality of conductors are measured in Ohms per Meter. The lower this figure is the better it is. A 0.22 Ohm/m wire is 150 times better than a 4 Ohm/m wire - the response is not linear but parabolic.
Insulators. The type of insulator you need (to hold the fence material on the post that supports it, while preventing the fence from contacting any surface that will cause current to leak) is determined by your choice of electric fence; most manufacturers market insulators specifically suited to their fence products. In general tape, braid, rope are installed on insulators that allow the fence to slide through. To help prevent chafe and wear on a tape fence, however, insulators need to be the type that clamps and immobilizes the tape (especially important in windy areas), and to be installed vertically on the fence post. Avoid cheap "generic" insulators (often made of brittle plastic), which only last a few years.
Testing, Testing... Why It's Important
When your electric fence is built, monitoring its voltage regularly-recommended daily, is a basic management practice, just like checking water buckets. Use a digital voltmeter that tells you exactly how many volts of current are on the fence. (How many volts are enough? Four thousand to 5,000--remember, there's no way this jolt of current can hurt your horse, but it needs to be definite enough for him to Electric Fence Testingremember it and want to avoid it.)
Your first check of your new fence's voltage gives you a baseline so that future checks can alert you to voltage drops that signal problems. Depending on the strength of your charger, it will emit 6000 to 10,000 volts when nothing is connected to it. After you've hooked it to your fence, check the voltage at the furthest point from the charger. Some drop in voltage--1500 to 2000--is normal. A more than 2000-volt drop means either your charger is underpowered for the fence, vegetation or something else is "loading" the fence (touching it, causing voltage to leak away), there's a short-circuit somewhere in the system--or a combination of these.
If the base voltage on your newly built fence is 4000 or better and everything's working fine, watch on subsequent checks for an overall voltage drop of 1500 or more. (It's normal for voltage to be 500-1000 lower in the morning when moisture on the fence, posts, and nearby vegetation can cause temporary current leakage.) Such a significant decrease means it's time to check for problems and correct them before your horse discovers the fence no longer packs a punch; in fact, many horses can sense when the fence is or isn't functioning
.

